Windows10自带Linux系统(WSL)安装并进行php开发与调试
从Build 14393版本开始,Windows10已经原生支持Linux,下面讲解一下如何使用wsl进行本地php开发与调试.
一、win10安装wsl
1)启用开发者模式
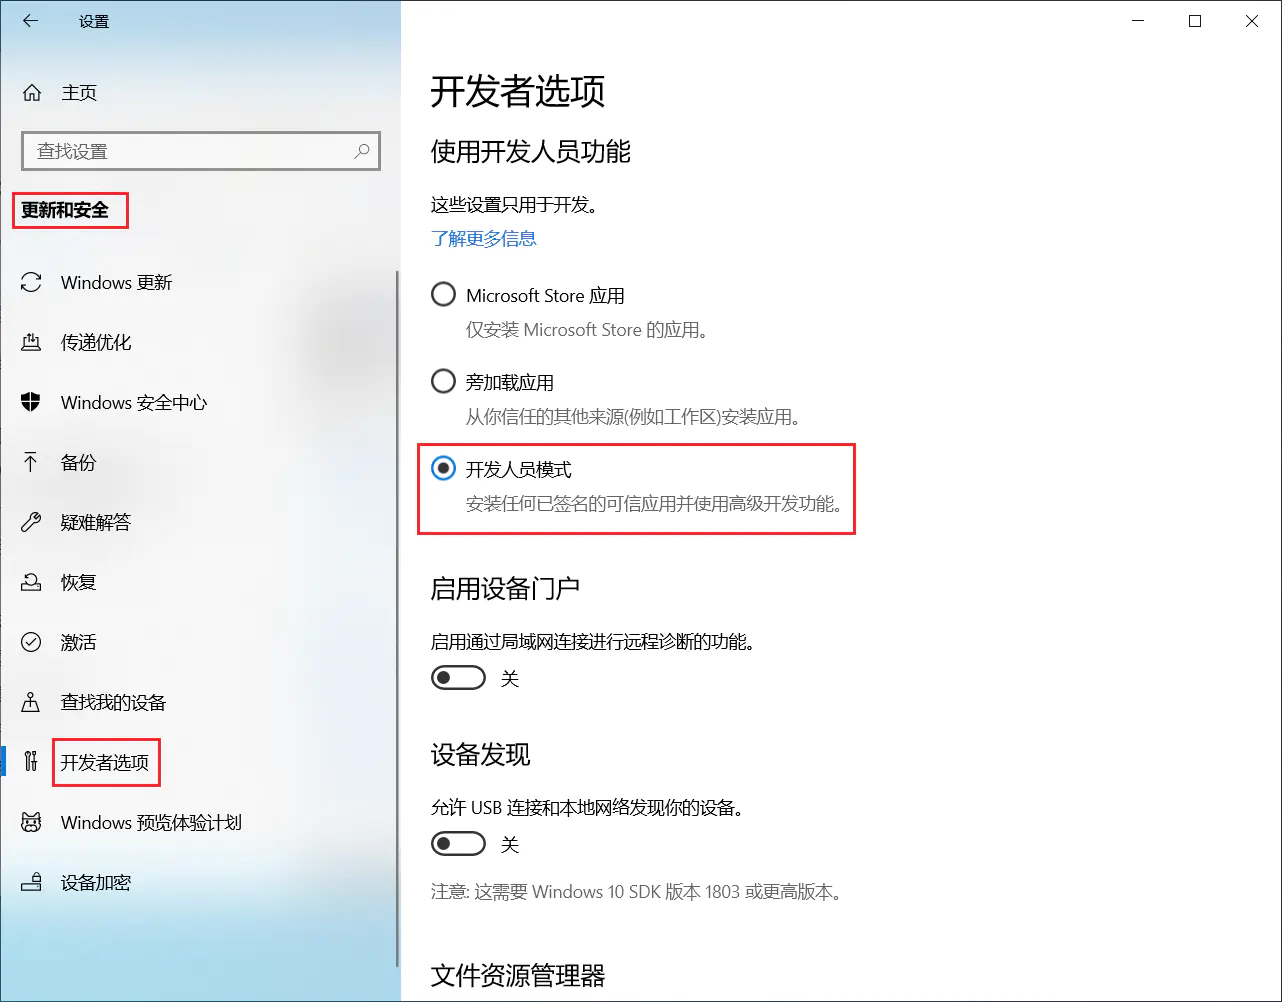
2)在 windows功能 中,启用 适用于 Linux 的 Windows子系统
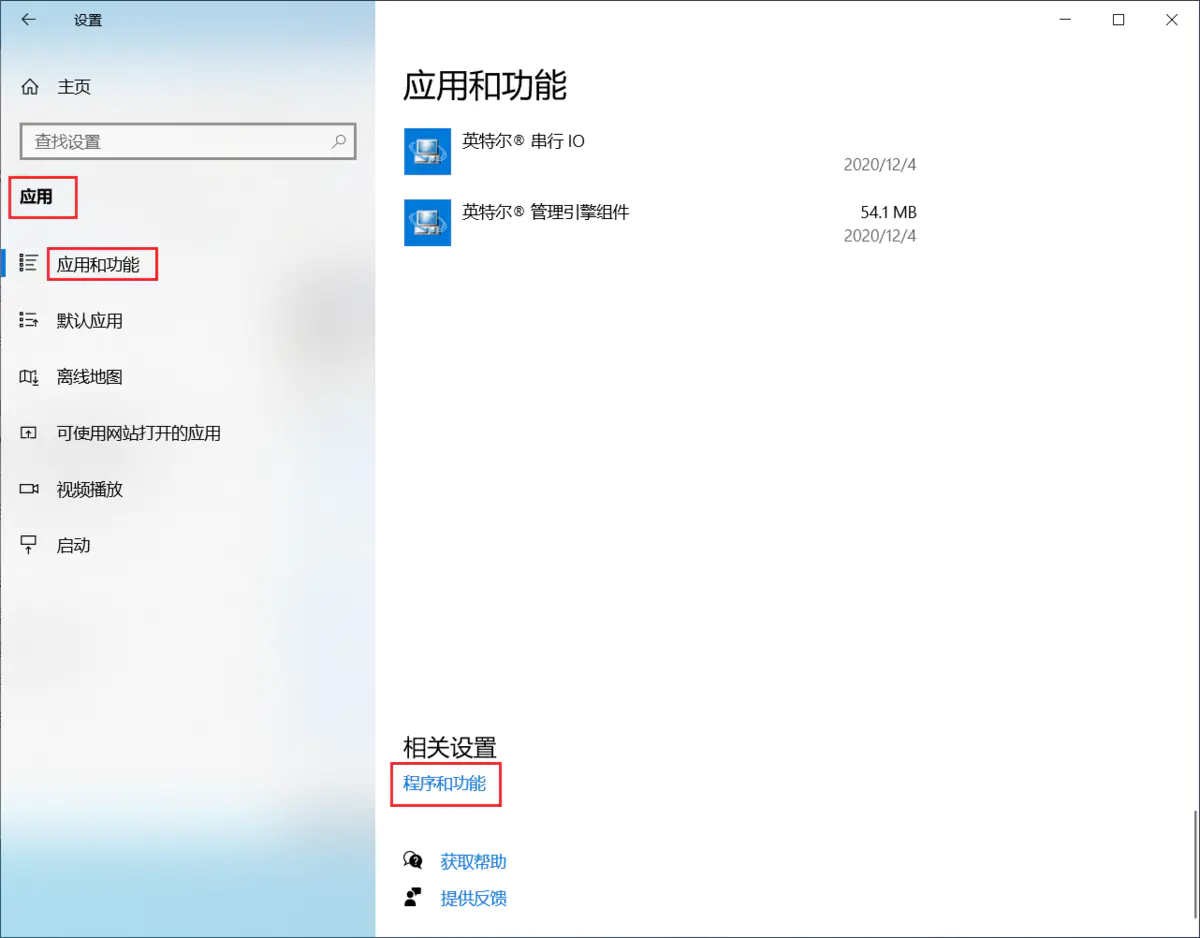
点选 →程序和功能:
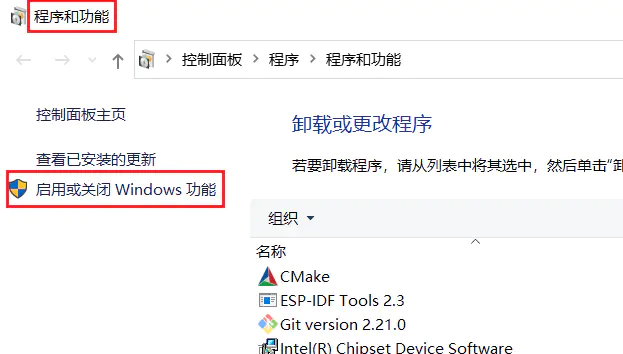
点选 启用或关闭Windows功能:
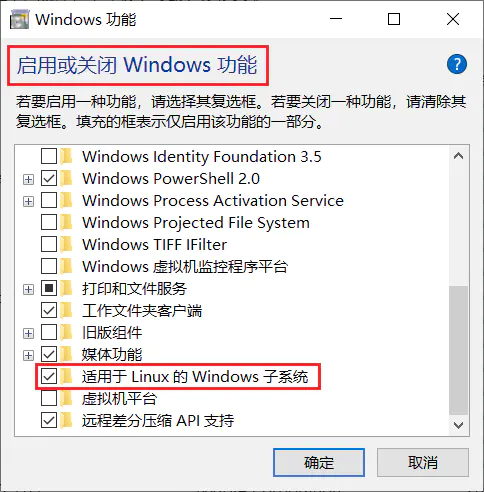
3)启用Linux子系统
右键点击Win10开始按钮,选择“Windows PowerShell(管理员)”以管理员身份运行Windows PowerShell。输入并回车运行以下命令:
Enable-WindowsOptionalFeature -Online -FeatureName Microsoft-Windows-Subsystem-Linux4)下载并安装Ubuntu(可通过Microsoft Store获取)
打开应用商店 (Microsoft Store),搜索linux(或者其它系统名称)
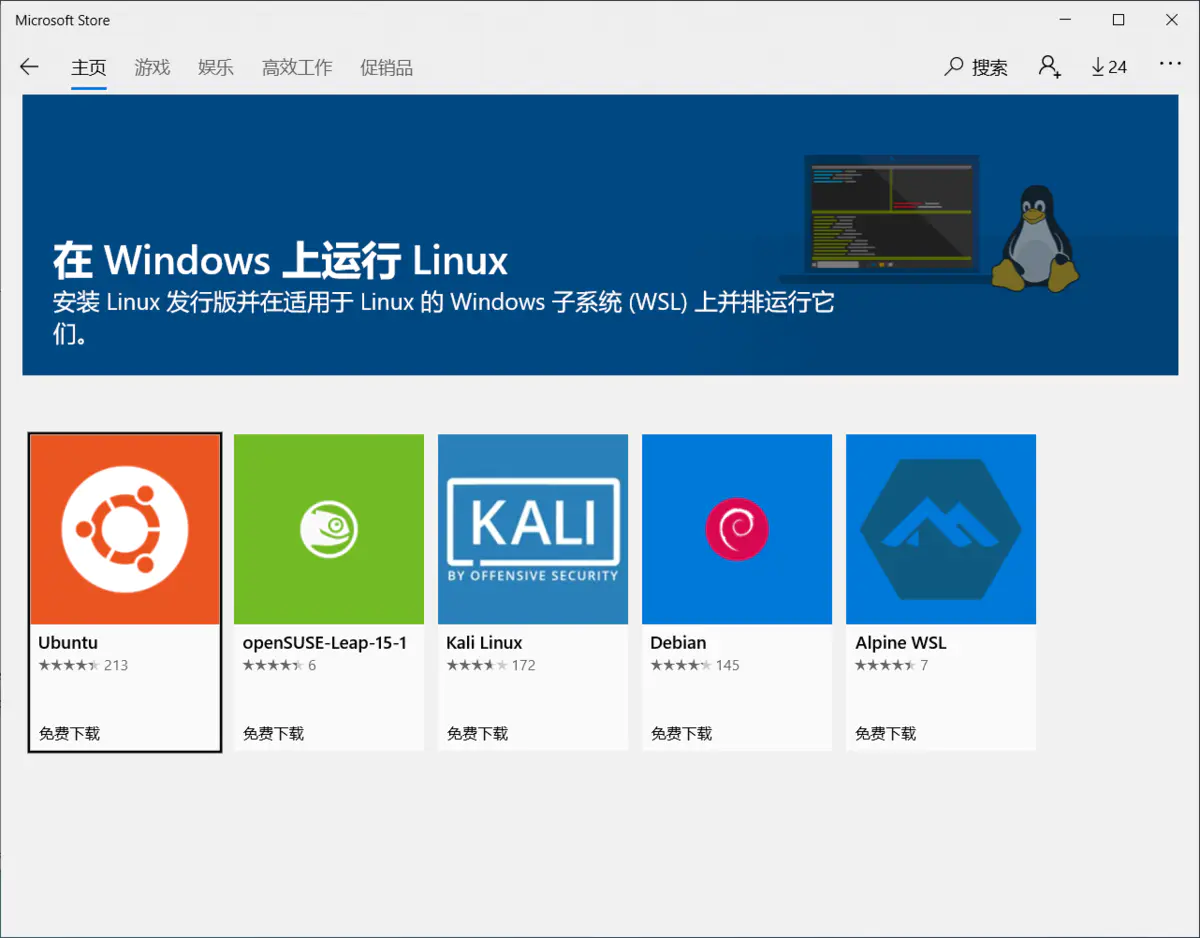
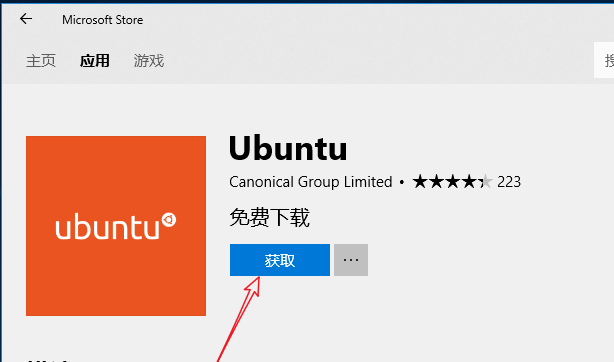
我们以安装ubuntu为例,进入ubuntu应用,点击"获取", 即可像安装普通Windows应用一样自动下载安装,速度很快。安装以后,还会显示“固定到开始菜单”按钮,方便以后启动Linux系统。如图:
重启动Windows后→点击开始→Ubuntu的图标:首次启动Ubuntu,会有一个安装过程,需要设置用户名和密码。
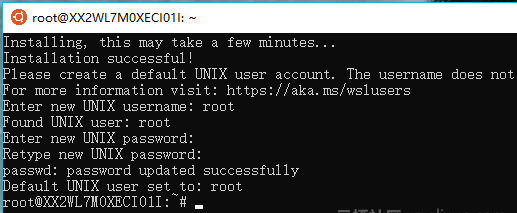
ubuntu安装成功,点击开始菜单中的"ubuntu"即可打开bash.
5)更换软件源(apt源和pip源)
系统默认的apt源是国外的,下载软件速度慢,python的pip源也很慢,我们都换成阿里云的源。
更换apt源:
cd /etc/apt/
sudo cp sources.list sources.list.bak && sudo vim sources.list
删除其中所有内容,替换成:
deb http://mirrors.aliyun.com/ubuntu/ xenial main restricted universe multiverse
deb http://mirrors.aliyun.com/ubuntu/ xenial-security main restricted universe multiverse
deb http://mirrors.aliyun.com/ubuntu/ xenial-updates main restricted universe multiverse
deb http://mirrors.aliyun.com/ubuntu/ xenial-backports main restricted universe multiverse

deb http://mirrors.aliyun.com/ubuntu/ xenial-proposed main restricted universe multiverse

deb-src http://mirrors.aliyun.com/ubuntu/ xenial main restricted universe multiverse
deb-src http://mirrors.aliyun.com/ubuntu/ xenial-security main restricted universe multiverse
deb-src http://mirrors.aliyun.com/ubuntu/ xenial-updates main restricted universe multiverse
deb-src http://mirrors.aliyun.com/ubuntu/ xenial-backports main restricted universe multiverse

deb-src http://mirrors.aliyun.com/ubuntu/ xenial-proposed main restricted universe multiverse

deb http://archive.canonical.com/ubuntu/ xenial partner
deb http://extras.ubuntu.com/ubuntu/ xenial main
然后执行
sudo apt update
sudo apt upgrade
修改pip源:
mkdir ~/.pip && vi ~/.pip/pip.conf在打开的vim中输入下文并保存:
[global]
trusted-host=mirrors.aliyun.com
index-url=http://mirrors.aliyun.com/pypi/simple/二、安装php服务器环境 宝塔面板
wget -O install.sh http://download.bt.cn/install/install-ubuntu.sh && sudo bash install.sh按提示进行操作,默认回车即可.安装成功如下图:
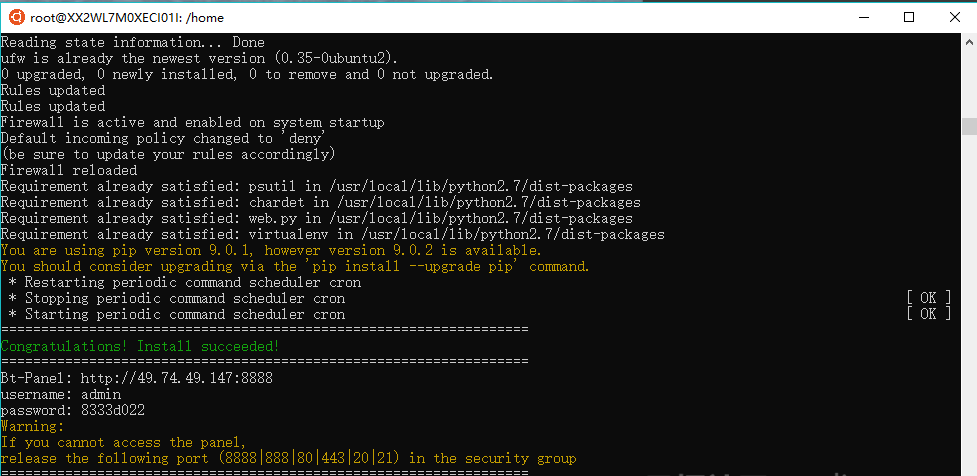
此时宝塔已经安装成功.打开浏览器,输入: http://127.0.0.1:8888 即可看到宝塔登录界面
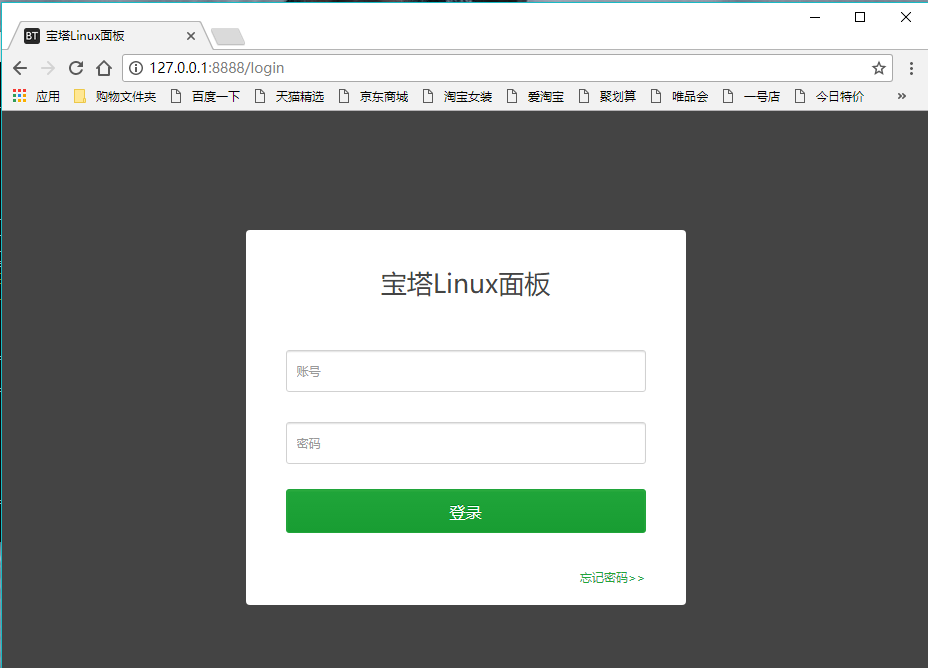
使用上一步骤中的提示的帐号密码进行登录,进入管理面板后,进入"软件管理",安装所需软件。
经过一段时间的安装过程,安装成功!
三、进行本地PHP开发的配置
为了完全模拟服务器环境,需要创建host以及服务器主机.
首先创建本地host.使用文本编辑器打开本地hosts文件,路径在:C:\Windows\System32\drivers\etc\HOSTS
在最后一行,添加一个新的host
127.0.0.1 test.local保存后关闭即可.
然后进入宝塔管理面板的"网站"管理,点击"添加站点"创建新网站.
在域名输入框中输入和上面的host一致的主机名称: test.local
其他选项可默认.点击"提交"按钮后,本地的主机环境就已经部署好了.
现在打开浏览器,输入"http://test.local"看看效果吧!
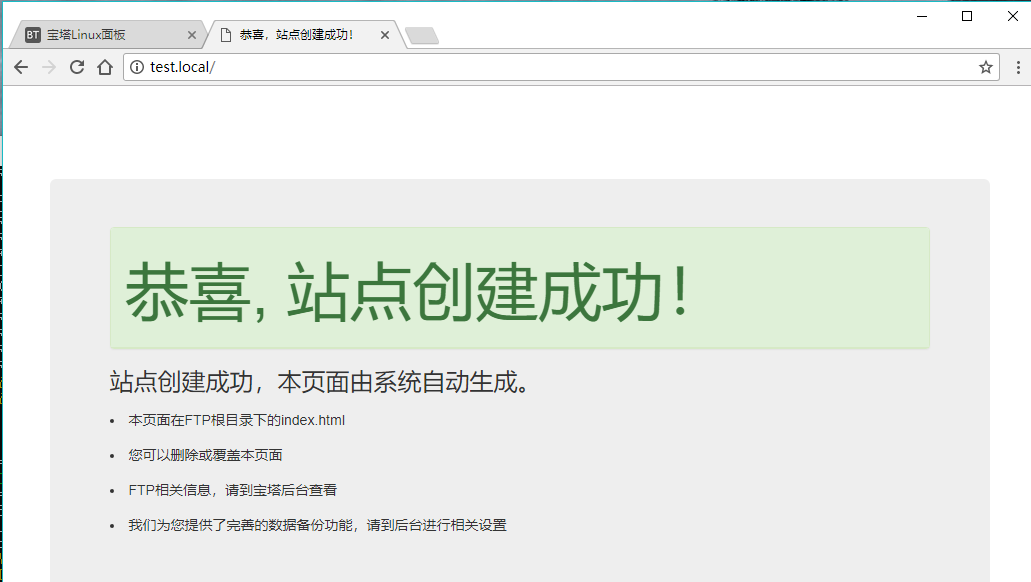
可以把网站目录设为实际开发项目的路径,比如 c:\web\test.这样,我们在VSCode或phpstorm中修改项目文件后,网站即可实现实时更新.
再次进入宝塔管理面板的"网站"管理,找到刚刚创建的网站,点击设置.左侧菜单中找到"网站目录",选择"/mnt/c/web/test",然后保存即可.
其中"/mnt/c"即代表 windows的c盘,依此类推 d盘根目录即为"/mnt/d".
现在我们就可以使用VSCode或phpstorm直接修改网站文件,并实时预览效果了!


These are in fact fantastic ideas in about blogging.
You have touched some fastidious points here. Any way keep up wrinting.